Wafflemania!
March 10, 2024 • No Comments
 Once in a while, I get a craving for waffles and then nothing else will do. I don’t need to worry about food allergies, but I know any number of people on gluten-free diets who have had to avoid the toasty decadence of this brunch favorite.
In an effort to end this tragic situation, I got together with a friend and tried three different gluten-free waffle recipes to see what we could learn. Note: we greased the waffle irons with olive oil for all the recipes
In the picture, from left to right, are recipes #1, #3, and #2. Note #1 used a small waffle iron.
Test Recipe #1:
My go-to recipe is from a 1907 Lowney’s cookbook. The page is covered with stains and splashes, which indicates it was used a lot. As is more common in these old recipes, it’s sugar-free and so can be used for sweet or savory combos–and if I’m smothering my breakfast in syrup anyway, I don’t need sweetness in the batter. The real secret to this recipe is whipping the eggs whites and folding them in last. This gives the waffle a fluffy, light tenderness that remained in a gluten free state. The only change I made was substituting Bob’s Red Mill 1-to-1 baking flour.
Sift:
2 cups of flour (gluten free, see above)
2 tsp baking powder
1 tsp salt.
Add:
3 tablespoons melted butter
1 cup plus 1/3 cup milk
3 egg yolks
Beat the egg whites to a stiff peak and fold into the batter. Cook to golden brown perfection!
Test Recipe #2:
Sift:
1.5 cups amaranth flour
1/4 cup tapioca flour
1/4 cup arrowroot flour
1 tsp baking powder
pinch each of salt, cinnamon, and nutmeg
In another bowl, mix:
1/3 cup apple juice
3 beaten eggs
1 tablespoon melted butter or vegetable oil
1/3 cup water
Add the dry ingredients into the wet and mix thoroughly. Add more liquid if the batter is too thick. Proceed to the waffle iron.
Test Recipe #3:
Follow Recipe #2, but use teff flour instead.
Our Findings:
All three recipes produced waffles that could be frozen and reheated. The first recipe was very close to a “traditional” waffle. The teff waffles had a nice nutty flavor, but were quite dense. These would be best served with a juicy berry mixture or other topping that needs a firmer base. I would like to try this one again and beat the egg whites separately as per recipe #1. The amaranth waffles were also sturdy, but had a lighter flavor I liked a lot. I think there’s more experimenting to be done, but overall this session produced a tasty product sensitive to gluten-free requirements.
Basic Pickled Beets
July 23, 2023 • No Comments

I often get over-excited at the farmer’s market and bring home more than I can use. Sometimes this applies to beets and, while I can steam the greens alongside chard, kale, or spinach, I can’t always use the roots as casually. So, I like refrigerator pickles that can be chopped into a salad, on a burger, or used as a garnish. Here’s a very easy recipe:
Steam 3-4 large beets, then slice to desired size chunks. Arrange in a large jar with a tight-fitting lid (a canning jar is ideal)
Boil together:
- 1 cup of cider vinegar
- 1 cup of water
- 1/3 cup sugar
- 1 tsp salt (large grain type, such as kosher salt)
- 1/4 tsp each peppercorns and mustard grains
- pinch dill seed
Pour the liquid over beets in the jar (don’t strain out the spices). Once the jar has cooled, refrigerate. This will keep for several weeks.
Applesauce Loaf
August 7, 2022 • 2 Comments
 Every autumn I turn the scruffier apples from my tree into applesauce. If I’m lucky, I can also scrounge extras from friends who have a bumper crop. Applesauce is great in baking, so I freeze as many pints as possible. It’s a moderate amount of work, but the payoff is worth it.
Here’s an easy applesauce loaf so moist it doesn’t need butter. The recipe makes two loaves, so I have one to freeze or give away.
Preheat oven to 350F. Lightly grease 2 loaf pans.
Sift together dry ingredients:
- 4 cups all-purpose flour
- 2 teaspoons baking soda
- 1 teaspoon baking powder
- 5 teaspoons cinnamon
- 1 teaspoon nutmeg
- ½ teaspoon allspice
- ½ teaspoon mace (optional)
- ½ teaspoon salt.
Combine:
- 2 ½ cups of applesauce
- ¾ cup sugar (could be more or less depending on preference)
- ¾ cup melted butter or vegetable oil
- 3 eggs
- 1/3 cup milk or kefir (I use coconut kefir)
Fold dry ingredients into the wet ingredients a little at a time until thoroughly mixed. Finally, mix in:
- 1 cup of nuts (walnuts, hazelnuts, or pecans are good)
Divide batter between the pans and bake for an hour or until a knife comes out clean. This may depend on the amount of water in your applesauce, so be sure to test it and bake a little longer if necessary.
I recommend this with sharp cheddar as a quick lunch on the run.
Hungary Water: Part 2
March 21, 2022 • 3 Comments
This is the continuation of this  blog describing the recipe and my first try at recreating Hungary Water. I left the test batches to steep for about three months. I waited some months more to let the scents settle down and blend.
My first observation is that volume is important. By the time I strained the vegetable matter from my test batches, I didn’t get much yield—maybe half a cup per jar. The results were also very concentrated. When I do this again, I’m going to use at least a quart-sized container and more liquid.
The rosemary scent dominates the results, but that could be because it was the one element that was home grown and therefore freshest. All three bases initially overpowered the scent of the herbs but calmed down with time. The witch hazel version was fairly raunchy when it first brewed but is now the most pleasant of the three. It is a nice addition to a bath and as a facial astringent. I used the cider vinegar version (diluted) to rinse my hair after shampooing it. This is an excellent way to add scent and shine, but please be careful with color-treated hair as the vinegar can be drying. The vodka version was my least favorite. It killed some stubborn weeds in the driveway and probably any other living entity within five yards. I’m pretty sure the driveway glows after dark and the raccoons are building a bomb shelter.
My honest assessment is that a) a greater liquid volume would create a better balance of scents, b) the combination of herbs could possibly be simplified, and c) I need to do more research into a good liquid base for this purpose. The witch hazel is acceptable, but I’d like to keep exploring.
Bottom line: this experiment opened the door to some interesting possibilities for more research and experimentation.
Pesto!
February 20, 2022 • 1 Comment
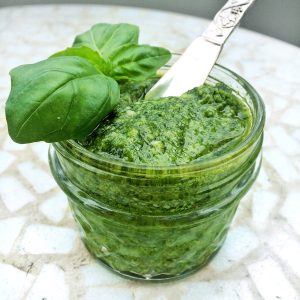
As a follow up to our previous post about basil, here is my favorite pesto recipe. Substitutions are easy–if pine nuts are too expensive, walnuts, toasted pumpkin seeds, or any combo of the three can be used. If basil is not in season, I’ve used spinach or a blend of spinach and arugula for a punchier sauce.
Put into blender or food processor:
- 4 cups of basil or other greens (such as spinach, parsley, arugula and/or other fresh herbs)
- Crushed fresh garlic (3 cloves) or good-quality powdered garlic to taste
- Half cup pine nuts or other nut/seed combo
- Scant cup of grated parmesan cheese
- Dash of lemon juice
Blend the above until smooth, adding olive oil to thin to the desired consistency (about 1/3 to 1/2 cup).
Pesto literally means “paste” and can be treated like any other condiment. It’s brilliant on pasta, but can also be combined with yogurt to make a great salad dressing. I also use it as a flavoring in wraps and sandwiches or as a veggie dip.
Mysterious Green Sauce
July 5, 2021 • No Comments
 Despite the title, I resist the term “green sauce” because (something like the enigmatic “brown sauce” encountered in the UK) I feel as if the creator won’t admit to what’s in it. Lots of things are green, but I won’t put all of them in my mouth.
No need to fear this version! This green sauce quick, easy, and very taste-bud friendly. Although the obvious use is on pasta, it’s also good as a garnish on potatoes, a mixed vegetable plate, or even salad. I also suggest trying it on fish.
Recipe:
I start with two large bunches of kale, stems removed and lightly steamed.
While that’s happening, I fry one small diced onion in a little olive oil. Once that’s starting to brown, add a generous handful of sliced mushrooms and 3 to 4 cloves of crushed garlic. Once that’s thoroughly cooked, set it aside. For those who are not garlic/onion tolerant, feel free to substitute a powdered version.
Put the kale into a blender
Add 2 ripe avocados
Add the onion mix
Add 3 heaping teaspoons of nutritional yeast
2 teaspoons of mixed dried herbs or whatever fresh ones you have in the garden (suggest oregano, marjoram, basil, or thyme)
1 ½ to 2 cups of kefir (can substitute plain yogurt)
Juice of one lime
Salt to taste
Blend until it’s smooth and creamy with no traces of solid kale.
Serve generously over pasta. For a final touch, garnish your pasta dish with pine nuts or broiled, halved cherry tomatoes.
This will keep in the fridge for a few days. A wide-mouthed jar is perfect for this.
Coconut Squash Soup
June 7, 2021 • No Comments
 The tale of this coconut squash soup begins with a trip to the farmer’s market, where a New Zealand blue squash followed me home. The variety was new to me (and, apparently, to the cat) so I was curious to see what I could do with it. As it turns out, this variety cooks up nicely with a flavor between a butternut squash and a pumpkin.
Quarter the squash, scoop out the seeds (these can be saved and roasted later) and bake on a cookie sheet at 325F until fork tender. Peel off the skin and mash. This should give you around 4 cups of cooked squash. If you have too much, it freezes well.
Fry until thoroughly cooked:
3 tablespoons olive oil
1 large diced onion
2 cloves garlic, crushed
1 tablespoon finely chopped ginger
Add:
1.5 tsp cumin
1.5 tsp coriander
1/2 tsp cardamom
1 tsp salt
1/4 tsp pepper
Cook for two minutes and add:
Your squash
6 cups vegetarian broth (low salt is best–you can add salt if needed)
Optional: Fresh garden herbs, if available (I use chives, oregano, and thyme)
1 can (14-oz) of low-fat coconut milk
Simmer for about half an hour. At the very end, add the juice of 1 lime. Then puree thoroughly so there are no lumpy squash bits.
This coconut squash soup is a very attractive, colorful soup, and makes a great centerpiece of a light meal.
DIY Historical Cosmetics: Queen of Hungary’s Water
April 26, 2021 • 3 Comments
 Queen of Hungary’s Water aka Hungary Water has been one of my favourite scents for as long as I’ve been wearing perfume. It’s herbal rather than sweet, with a clean, bright finish. Though no two blends are exactly the same, lemon and rosemary are usually the dominant notes. As I was making this up, the scent of the herbs was almost dizzying. It’s like a herb garden in a jar.
Some sources claim Queen of Hungary’s Water is the first alcohol-based perfume, or at least the first European one, and dates from the beginning of the fourteenth century. It’s also used as a skin tonic, the herbal ingredients effective against acne and eczema, among other issues. In addition, it can be used to bathe the temples to cure a headache. It is for external use only. Do not drink it or take it as a tincture.
Ingredients are important
There are a lot of different recipes for Hungary Water, but be careful. Beware of recipes that use lemon verbena as a main ingredient as the essential oil of that plant has been linked to sun sensitivity, which can increase the likelihood of sunburn. Lemon balm does not have the same problem.
Try to get organic herbs and essential oils if you can. Good quality dried herbs will store in a cool, dry place until it’s time to make another batch.
Recipe:
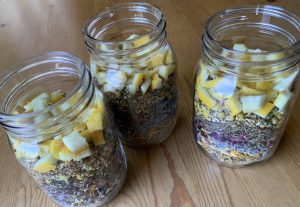
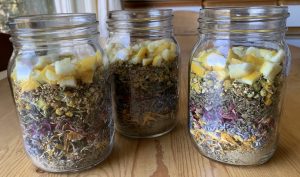
Layer the herbs in a wide mouth jar. A mason jar is ideal (bigger is better – the herbs swell once the liquid goes in).
2 tablespoons of lemon balm
2 tablespoons of lavender
2 tablespoons of calendula
2 tablespoons of rose petals
2 tablespoons of chamomile
1.5 tablespoons of comfrey
1 tablespoon of sage
1 tablespoon of rosemary
1 tablespoon of peppermint
1 tablespoon of elderflowers
12 drops of helichrysum oil
Top with chopped lemon peel (1/3 of a lemon rind, pith removed)
Cover the herbs with apple cider vinegar, witch hazel, or vodka. Allow for a couple inches of liquid above the herbs. Store for several weeks, shaking a couple of times a day.
As this is my first time making this, I’ve done one each using the vinegar, witch hazel, and vodka to see which turns out best. Please see this blog for the results.
I based this recipe on several existing sources both in books and online, including this one, this one, and this one. I’ll adjust the ingredients as time goes on until I create my own preferred combination. For now, I’m sharing my experiment with you!
Post Script
Please note:
Yes, I am a writer of vampiric fiction, but before you get excited, dear reader, the Hungarian noble in question is not Elizabeth Bathory of “bathing in the blood of virgins” fame, nor does this post describe a bracing post-blood tonic or solution for that awful bathtub ring. I suggest a foaming cleanser with plenty of bleach for that.
Victorian Funeral Biscuits – the Recipe
• No Comments
 Funeral biscuits played a part the Victorian tradition of death and mourning. I cover their history in my previous post on the topic, and now we come to the recipe.
Sadly, it’s hard to know exactly what the biscuits tasted like. Even if they were available in a museum somewhere, I’m not like the Eating History guys and willing to nosh on decades-old treats. To make things more difficult, I could not find funeral biscuits in a cookbook I trusted. One recipe included modern ingredients and others were vague to the point of uselessness. So, I set out to invent something from those items that appeared in the majority of texts.
Consistent ingredients were flour, sugar, and caraway seed. I tested various combinations of other things, including icing sugar, milk, and cornstarch. Results varied from interesting charcoal to hard as a brick. When I did finally achieve a good result, I understood why rationing during wartime finally finished off the production of these biscuits–they’re no good without lashings of butter.
Victorian Funeral Biscuits
Preheat oven to 350 F
Cream: 1.5 cups of sugar with 1 cup of soft butter
Add: 1 tsp vanilla and 2 extra-large beaten eggs (or 3 smaller ones). Mix until smooth
Sift: 2.5 cups of flour, 2 tsp of cardamon, and 1/2 tsp salt. Add to wet ingredients a bit at a time along with a tablespoon of whole caraway seeds (some recipes recommend toasting these before adding them to the dough).
Mix until all wet ingredients are absorbed. The dough will be slightly sticky. If you wish to use a cookie stamp, chill for a few hours before going further. Otherwise, make a small ball and press with a fork to form the cookie. Keep rinsing the fork in cold water to keep it from sticking in the dough.
Bake on a greased cookie sheet for 12 minutes or until the bottom just begins to turn brown. (Do not overbake!) Cool slightly before moving to a wire rack. The result should be a crisp, slightly caramelized bottom with a softer top.
 As noted above, this recipe is only an estimation of what the original Victorian funeral biscuits might have been like. The quality of ingredients today is very different, as those of us who experienced “Buttergate” can attest. However, I think this is a reasonable approximation of the buttery, slightly spicy biscuit that’s perfect with tea after a brisk seaside stroll.
Gluten-Free Almond Chocolate Chip Cookies
February 5, 2021 • 2 Comments
Not all gluten-free products belong on a diet plan. Some recipes are shamelessly loaded with sugar and butter, like this one. Needless to say, it’s so yummy even the most ardent junk food addict will enjoy it.
Gluten-Free Almond Chocolate Chip Cookies
Preheat oven to 350F
Cream: 
3/4 cup of sugar (try ½ cup brown to ¼ white)
2/3 cup soft butter
I used a food processor with a mixer blade for this—thoroughly creaming the butter makes a better cookie.
Mix in:
½ tablespoon vanilla
2 eggs
½ tsp salt
½ tsp baking soda
3 cups of almond flour
1 cup milk chocolate chips
Spoon onto greased cookie sheets. These cookies spread quite a bit, so make them small and give them lots of room. In my oven, 12 minutes was the perfect time to get a golden-brown cookie with a crispy outside and soft inside. When the cookie sheet comes out of the oven, allow it to cool slightly before transferring the cookies to a cooling rack.


